Free Blog Installation and Setup Service
Enter your email address below and we'll answer every question you have about blogging. We’ll even install and setup your blog for you when you’re ready to get started – completely free of charge. No catch, no strings attached.
Part 1 of this course shows you exactly what you need to do to purchase a domain name and web hosting, install WordPress (the blogging platform we will be using) and even publish your first blog post.
But let’s not get ahead of ourselves – you may already have some questions at this stage. In fact, there are three questions that we definitely need to address before we move on.
What is a Blogging Platform / Content Management System?
Back in the late 90s / early 2000s, many people would create websites in a very different (and more complicated) manner to how we are going to in this guide. I was one of those people.
We used markup and style languages – HTML and CSS – to tell the browser what we intended to display and how we wanted it to be displayed. You could do this using nothing more than Notepad for Windows or TextEdit for Mac.
If you’re wondering what this looked like, you can actually view the code that is used to render any given page you’re looking at on your browser (you can usually find a menu option in your browser called View Source to bring up this code).
For example, here’s what’s going on behind the scenes of the webpage you’re reading right now:

Looks complicated, doesn’t it?
That’s why we use blogging platforms (or content management systems) these days. They enable you to create awesome-looking websites without having to know a line of code, using a WYSIWYG (What You See Is What You Get) GUI (Graphical User Interface).
To explain things with less acronyms, with a blogging platform like WordPress, you can see exactly what your website will look like without having to know what’s going on behind the scenes, and you can change and add to your website in the same way that you might create a Word file. It’s kind of like having Microsoft Word for websites (if such a thing existed) installed on your domain.
However, content management systems like WordPress are also incredibly powerful – you can change literally anything on your site if you have the necessary coding chops.
The best content management systems offer great balance – they enable complete beginners to create websites with absolute ease, but they also leave the door open for more technically accomplished folks to do exactly what they want.
Why Use WordPress? Why Not Use a Free Blogging Platform?
These two questions can really be answered in one, because in choosing self-hosted WordPress, you have to pay for web hosting (hence ‘self-hosted’ – i.e. you’re installing it on your own paid-for domain name and web hosting account).
So why WordPress? My answer is simple: it is the most user-friendly and powerful content management system that I know of. When it comes to creating a blog with relative ease, WordPress is the daddy.
My opinion is backed up by some pretty compelling statistics:
- Over 20% of the entire web runs on WordPress
- WordPress makes up 60% of the content management system market (in terms of the total number of users)
If you’ve been doing your research, you will know that there is a free version of WordPress available at WordPress.com, where you can sign up and get your own http://mysite.wordpress.com/ blog in no time at all. So why not go for that instead of paying for ‘self-hosted’ WordPress?
In brief, because of these compelling reasons:
- Theme modification. You cannot custom edit WordPress.com themes (i.e. the ‘skins’ you use to change the appearance of your site) – if you don’t like a certain aspect of a theme, you’re stuck with it.
- Plugin availability. With WordPress.com, you can only use the platform’s built-in features – you cannot extend its functionality through plugins. Meanwhile, with self-hosted WordPress you can choose from literally tens of thousands of free and premium plugins and extend the functionality of your website in an almost unimaginable number of ways.
- Domain. If you intend to take your blog seriously, you’ll want your own domain (i.e. http://www.mysite.com/ rather than http://mysite.wordpress.com/). You get this with self-hosted WordPress; you don’t with WordPress.com.
- Advertising. You cannot run paid advertising on your WordPress.com site (unless you receive 25,000+ pageviews per month, in which case you have to split advertising profits 50/50 with WordPress.com).
Now some of the above features are available with WordPress.com – if you pay for them. But if you start handing over money to WordPress.com for features already offered by self-hosted WordPress, you might as well pay for self-hosted WordPress!
In case you’re wondering about other free platforms like Blogger and Tumblr, the same general arguments apply. In fact, these other platforms can be even more limiting than WordPress.com.
Furthermore, self-hosted WordPress is hardly a costly proposition – you can get started for as little as $4.95 per month.
I hope that persuades you, because the remainder of this course operates on the assumption that you will be using self-hosted WordPress. As a WordPress.com user, you will not be able to take advantage of many of the plugins and features mentioned in this guide.
So, without further ado, let’s get cracking!
How to Create a WordPress Blog From Scratch
First of all, you’ll need to purchase a domain name and some web hosting.
Click here to access the Bluehost homepage. Bluehost are my domain name and hosting provider of choice – all of my websites are hosted with them, including the one you’re currently reading this tutorial on. They also offer a 30-day Money Back Guarantee.
(Please note that I will receive a commission from Bluehost if you choose to purchase hosting via the link above. This does not affect the price you pay – you are getting the best possible deal. If you would like to support the ongoing development of this course and its related materials, please click on the above link to make your purchase!)
On the Bluehost homepage, hover over products in the navigation bar and click on Shared Hosting.

On the next page, click get started now.
The following page is where you’ll choose your hosting plan. You have three options:
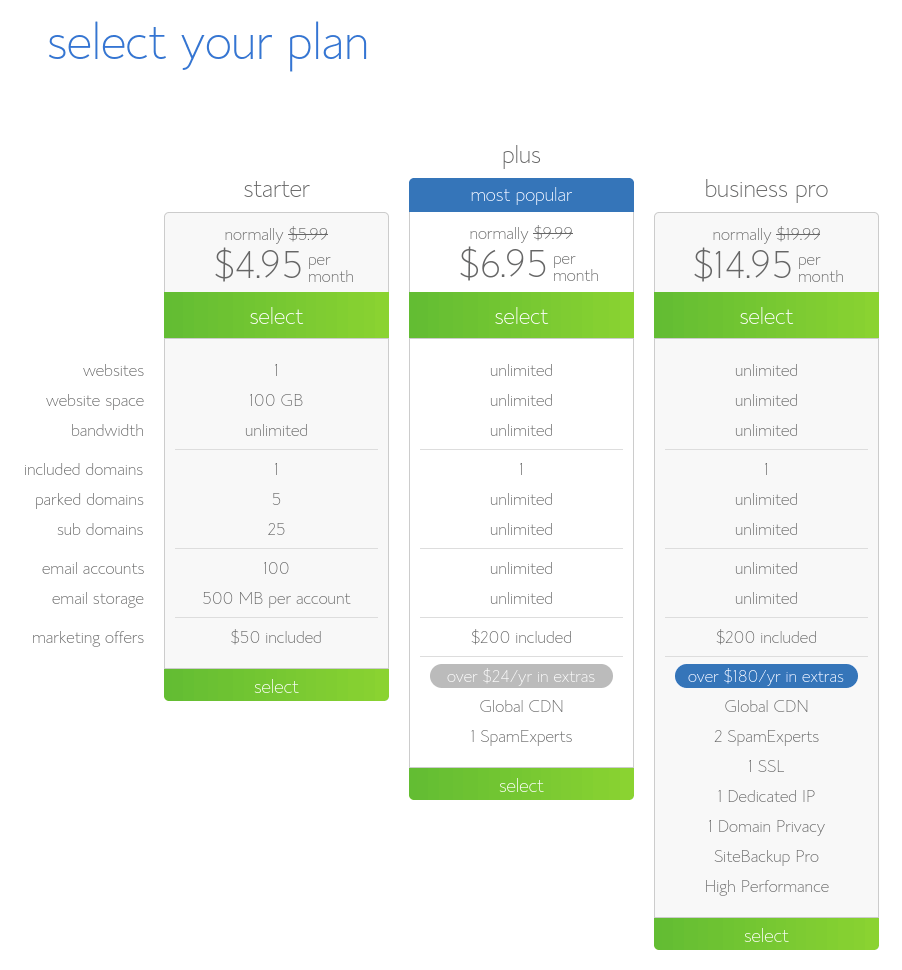
Unless you have immediate plans to run more than one site, I recommend that you choose the ‘starter’ plan. This will give you everything you need to get your blog up and running, and you can always upgrade to more advanced plans in the future if your requirements change.
It is of course up to you though. Pick your plan and click on the relevant select button.
Enter your chosen domain name on the next page and click on next.
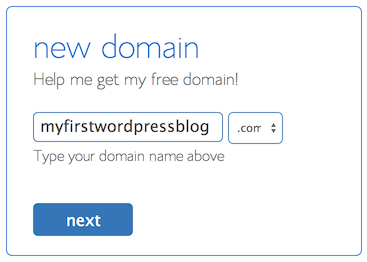
If you’re not sure what domain name to choose, check out this wonderful guide.
There’s also a simple solution if you’re struggling to think of a domain name: use your full name (or a variation of it). This gives you free reign to blog what you like about if you’re not yet sure what you want to focus on in the long term. If it’s good enough for Chris Guillebeau and Michael Hyatt, it’s good enough for us 😉
Please note that your chosen domain name may be taken; you may need to try a few different names before you find one that hasn’t already been registered. If you find this process a little frustrating, remember this: your domain name doesn’t have to be permanent. If you’re not 100% happy with your domain name, you can always change it in the future (you can grab a new domain for as little as $11.99).
All things being well, you will see a confirmation message on the next page:

You’ll need to enter your account information below that message.
Next, confirm your account plan. I recommend a 12 month subscription to start with, but you can reduce the monthly cost with longer subscriptions – 24 months or 36 months.
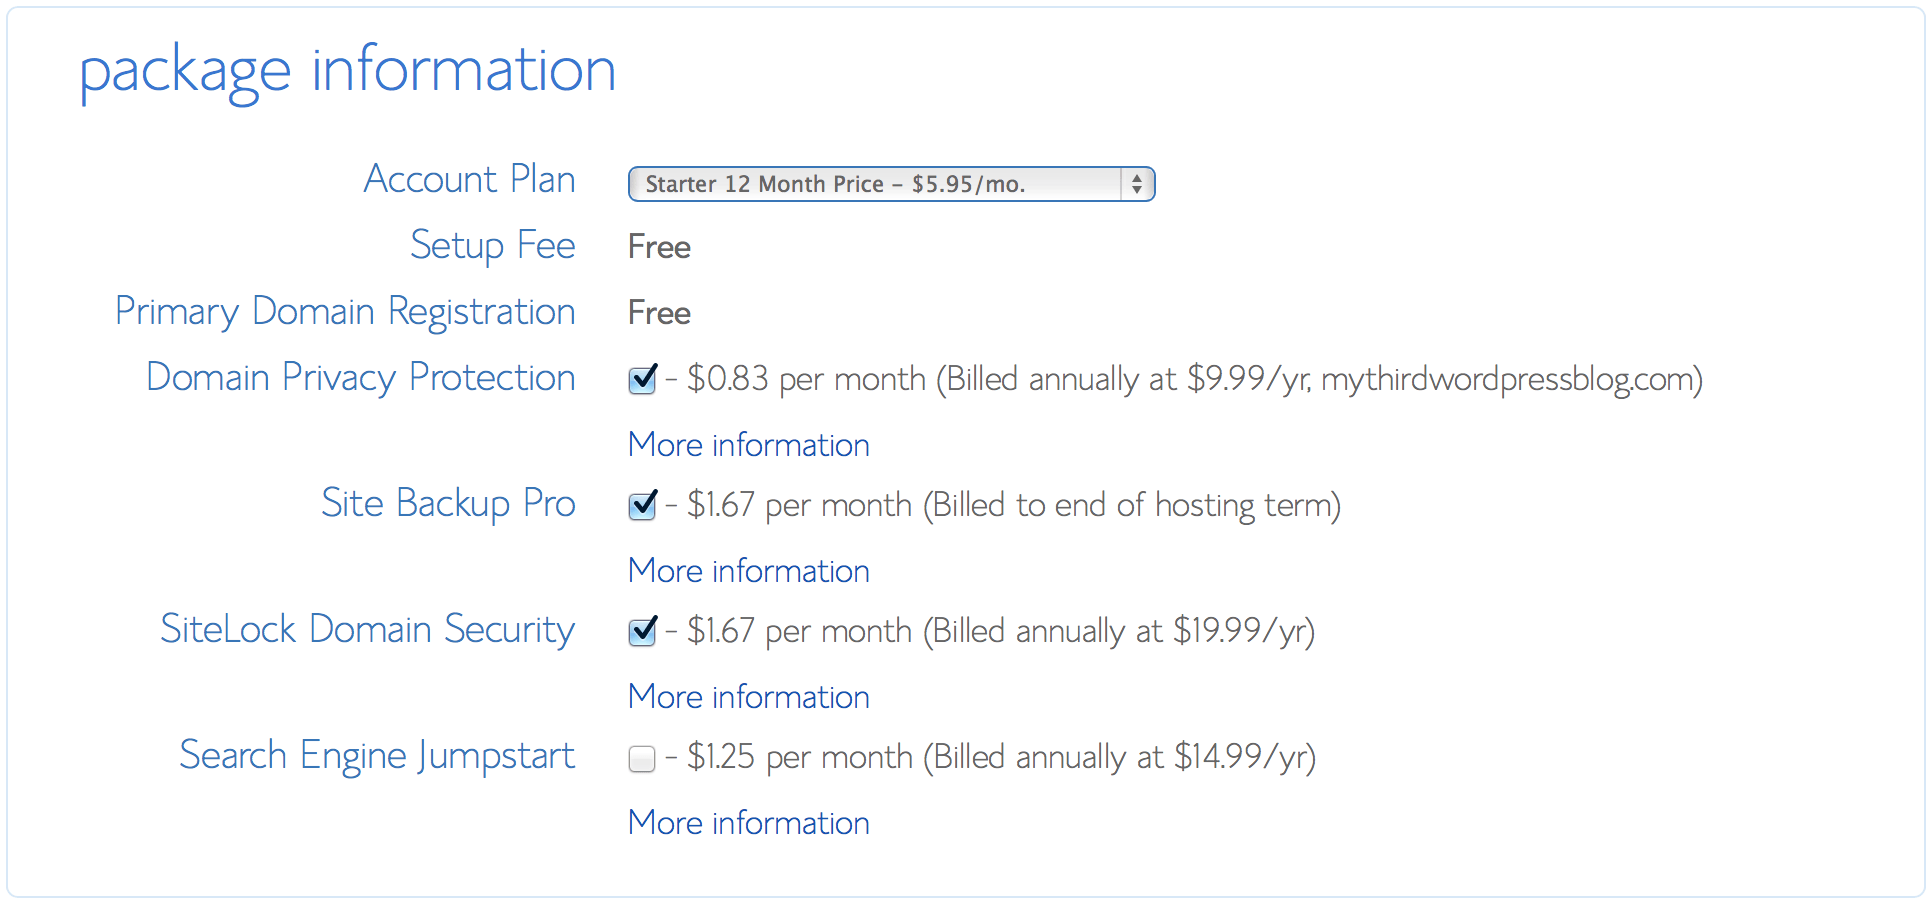
You may be wondering what the other options are, so let’s take a moment to explore them:
- Domain Privacy Protection. I can’t put it better than Bluehost does: “The whois information for any domain name is available to anyone on the internet. Your whois information can be harvested by marketing companies, which will give you unwanted solicitations. When you add Bluehost Domain Privacy to your registration, the only information listed in the whois will be Bluehost.” Basically, it’s an issue of privacy. Decide whether you want it accordingly!
- Site Backup Pro. This is not mandatory, but I strongly recommend that you leave this box checked. It is vital that you take regular backups of your site, and for just $1.67 per month, Bluehost’s backup service is great value for money.
- SiteLock Domain Security. This is not essential, but check out the features by clicking on More information and decide for yourself.
- Search Engine Jumpstart. You don’t need to start worrying about search engines just yet, so unless you’re keen on the features it offers, leave this unchecked.
I recommend that you leave the boxes as they are, but it is of course entirely up to you.
Next, enter your billing information. You can pay by credit card, or if you would prefer, you can click on More payment options to pay by PayPal.
You may notice that although there is a monthly fee for hosting, Bluehost charges you annually. So instead of paying say $6.95 per month, every month, you pay $83.40 for the whole year up front.
Don’t let that worry you though. Not only do Bluehost have a 30 day Money Back Guarantee, they also offer pro rata refunds after that time. So if you decide to cancel your hosting three months from now, you’ll still get your money back for the remaining nine months.
Once you’re finished and happy to proceed, click on the big green next button at the bottom of the page:

You may now be presented with a bunch of ‘Additional Options’, such as a QuickStart Coaching Session or additional domain names. You might like to consider these options,but none of them are necessary. We’ve got you covered 🙂
Head right down to the bottom of the page and click to skip to the next page:

You’ll be taken to a confirmation page, where you’ll be prompted to create a password. Click on the create your password button:

You’ll be taken to a page where you can create a password for your account. I recommend that you use Bluehost’s password generator for this purpose – they’ll create a really secure password for you. It’s entirely up to you though.
Click on the Password Generator button. A new window will open with a unique password generated for your account.
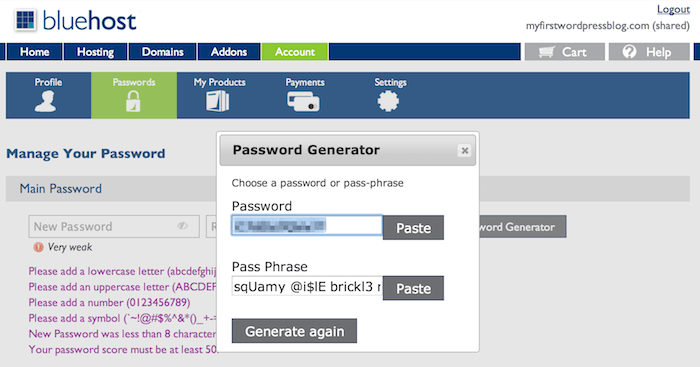
Make a note of the password, then click on the Paste button. The password will be pasted into the two fields. You can then click on the Create button.

You’ll then be taken to an Account Login screen. Enter your domain name and your password and click the login button.

The first time you login, you may be directed to a optimized hosting offer page like this:

You don’t need to worry about optimized hosting right now, so just click on the No thanks, I’m not interested link at the bottom.
On the next page you’ll see a “Welcome to Bluehost” notice:
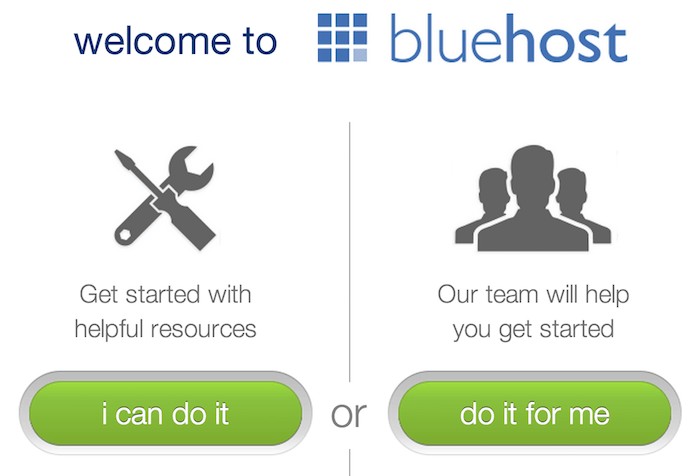
You can click on the i can do it button, because we’re going to take care of things ourselves.
Next you’ll be presented with a list of options:
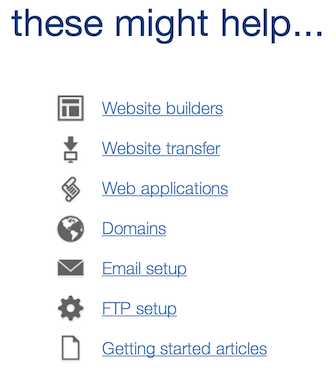
Click on the Website builders link. On the next page, click on the Use WordPress button from the three options:
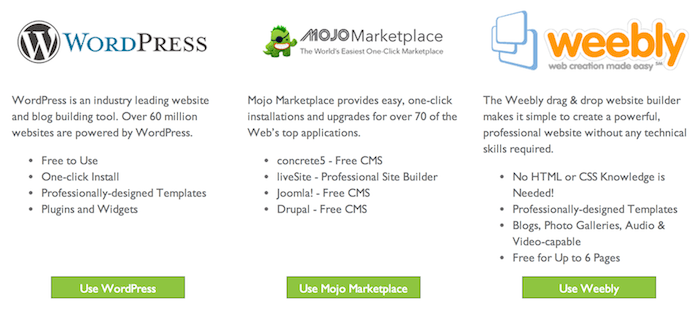
Now you can install WordPress onto your site. Go ahead and click on the Install button.

On the next page, select your new domain name from the drop down box and click on Check Domain.

Check the box to confirm that you have read the terms and conditions and click on Install Now.
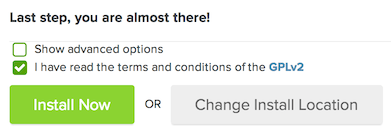
It’ll only take a few moments for WordPress to be installed on your domain.
Once the progress bar on the page has filled up, click on the No thanks, I am a web designer link at the bottom of the page.
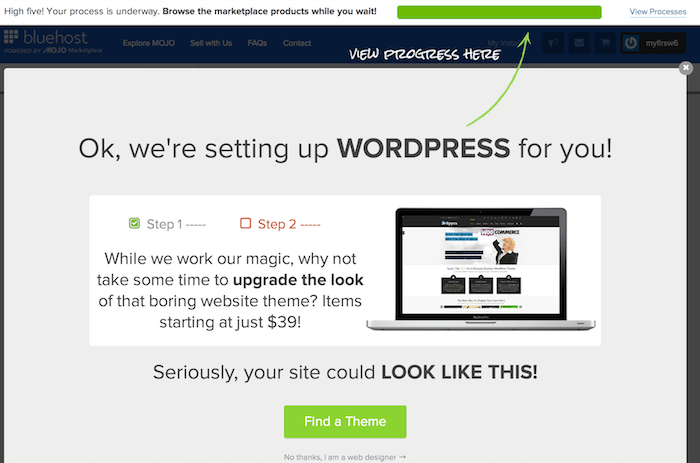
(Don’t worry – you absolutely do not need to be a web designer to create a good-looking blog!)
That’s it! WordPress has been installed and will be live on your domain right now. Seriously, I’m not kidding – open up a new browser tab and type in your domain name and you’ll see something like this:
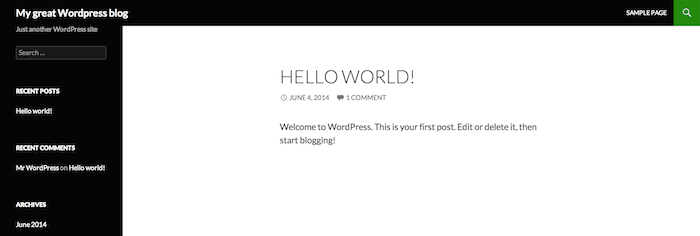
That wasn’t so difficult, was it?
To finish off, let’s get you logged into your brand new site so you can create your very first blog post.
Click on the View Credentials button within the bright orange ‘Your install is complete!’ message at the top of the page:

On the following page you will find a WordPress installation confirmation alert. Click the View link to the right of that alert.
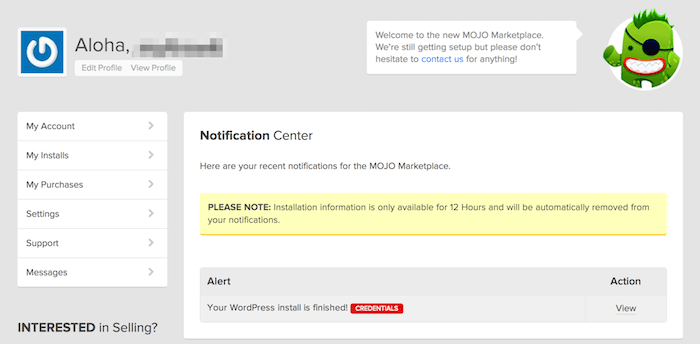
You’ll now be presented with your username and password:
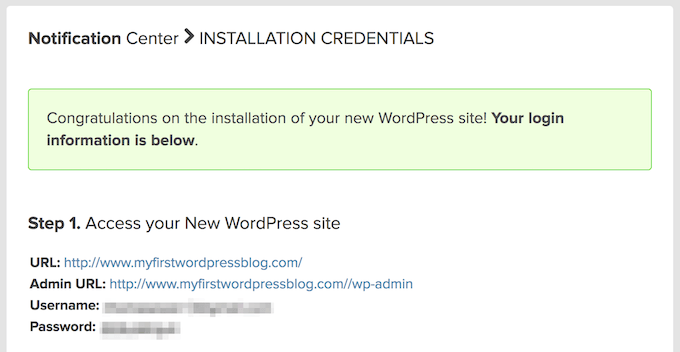
Make sure to keep these safe, as this notification will be deleted from your account after 12 hours.
From this screen, click on your domain’s Admin URL. You’ll be directed to your blog’s login page:
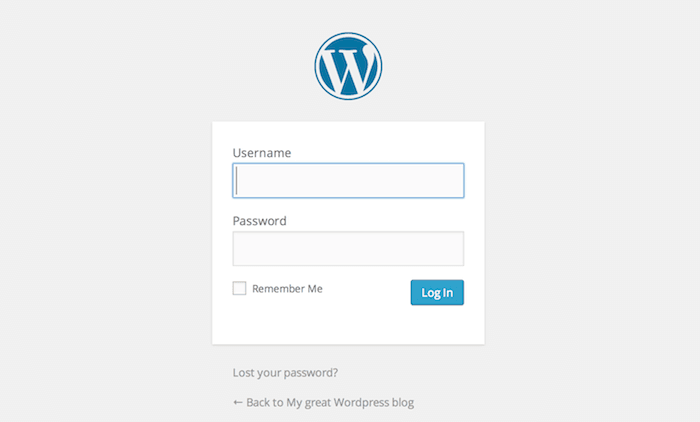
Enter your username and password then click on the Log In button.
Congratulations! You’ve made it to the promised land – the WordPress Dashboard:
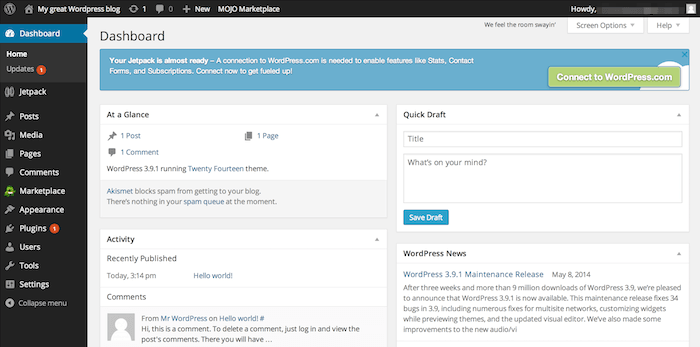
If you’ve scanned through the steps to see how easy the process is, you should be ready to start now! Click here to head over to Bluehost and start creating your blog!
The Dashboard above may all look rather overwhelming at first, but you’ll get used to it in no time at all, I promise.
In fact, I’m going to show you just how user-friendly WordPress is by helping you to publish your first ever blog post. Believe it or not, it’ll take you just a few more clicks.
From the Dashboard you can access all of the tools you need to create your blog.
To create your first post, hover over Posts in the side bar and click on Add New.
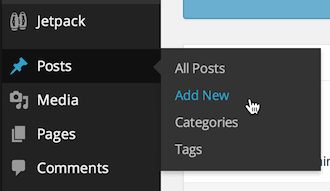
You’ll be taken to the Add New Post screen:
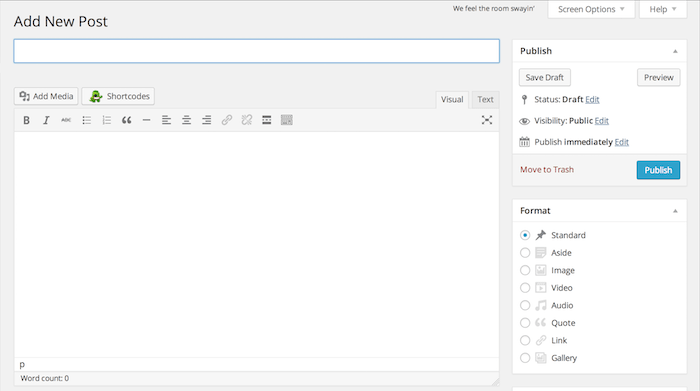
This is where you’ll spend a lot of your time; creating posts for your blog. Now we just need to do three things to get your first blog post published.
First, enter a title in the first box (where it says Enter title here).
Second, add some content in the big text box below the title box. You’ll find that this box functions in much the same way as Microsoft Word or Google Docs – it’s very user friendly.
When you’re done you should see something like this:
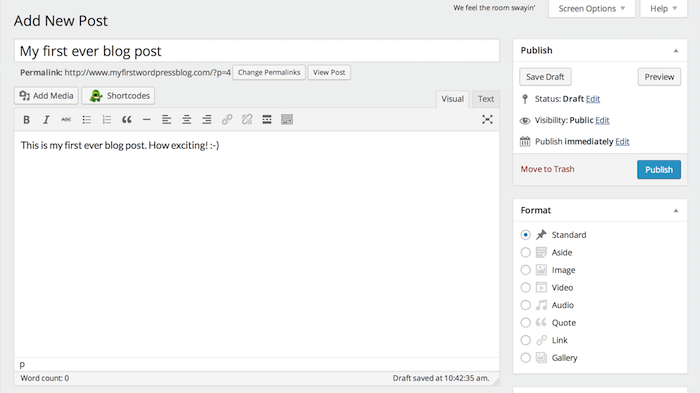
Now you have just one thing left to do: click on the the Publish button.

Once the post is published, you’ll be returned to the same screen, but there will be a notification at the top:

Go ahead and click on View post. Here’s what you’ll see:
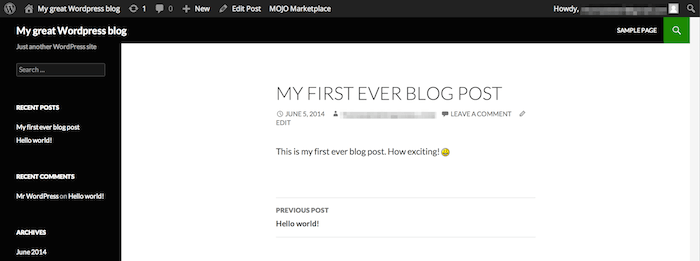
There it is! Your first ever blog post, published on the web for anyone to see.
Ready to get cracking if you haven’t already? Click here to head over to Bluehost and start creating your blog!