Free Blog Installation and Setup Service
Enter your email address below and we'll answer every question you have about blogging. We’ll even install and setup your blog for you when you’re ready to get started – completely free of charge. No catch, no strings attached.
When you purchase new a Windows PC, you usually find that:
- there is some pre-installed software that you don’t want, and
- the settings aren’t exactly as you would like.
WordPress is a little similar. Fortunately, changing the settings to suit your needs and removing the ‘software’ you don’t need is much easier than on a Windows PC.
With the above in mind, in this part of the Beginner Blogging course, we’re going to do a little housecleaning and get your site set up correctly.
I recommend you follow these steps before you start doing anything else with your site, as some of the changes can have an impact on anything you do subsequently. However, if you’ve already started fiddling, don’t sweat it – you can still take these steps now and things will probably be fine. Just about anything you change in terms of the settings is reversible or recoverable.
One more thing before you get started: we’re not going to be covering all of the settings in WordPress in this section of the course. Not by a long shot – just the most important ones. So don’t be worried by the multitude of settings you’ll see – you don’t need to touch them at this point.
Step 1: Edit Your User Profile
Your User Profile on your WordPress site is just like a user profile on any site – it stores relevant details including your username, password, etc.
At this stage you only need to worry about two things in your profile: your display name and your password.
Your Display Name
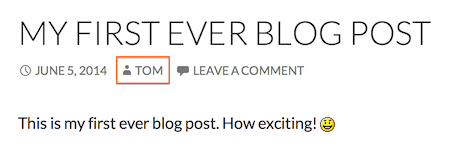
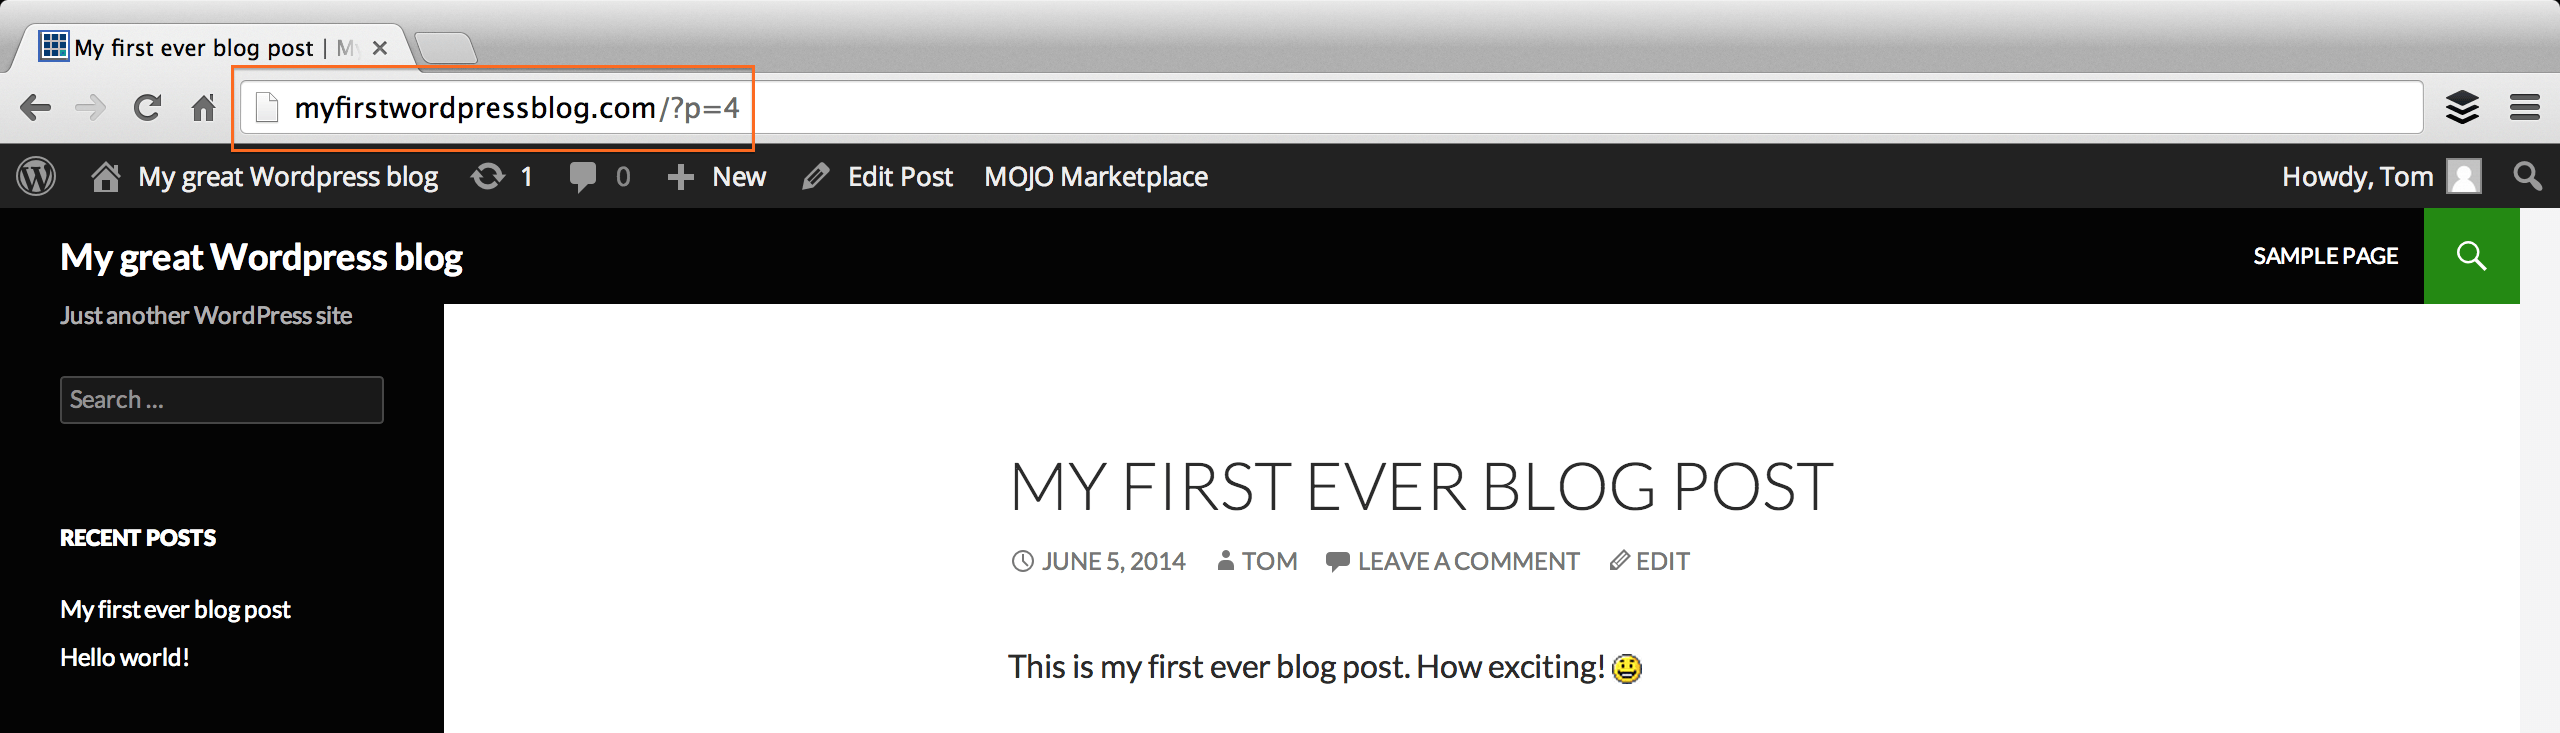
As you might expect, your display name is the name that shows up on the front end of your blog. If you go back to the sample blog I set up, you’ll see my display name on the first blog post:
Depending upon the theme you ultimately choose for your site, your display name may or may not be displayed to visitors. Most of us will want our names to be displayed on our blogs, so let’s take a moment to make sure its set correctly.
Navigate to Users > Your Profile from the sidebar. You’ll find yourself on the Profile page, which contains a bunch of settings related to your user profile.
The section we’re interested in is Name:
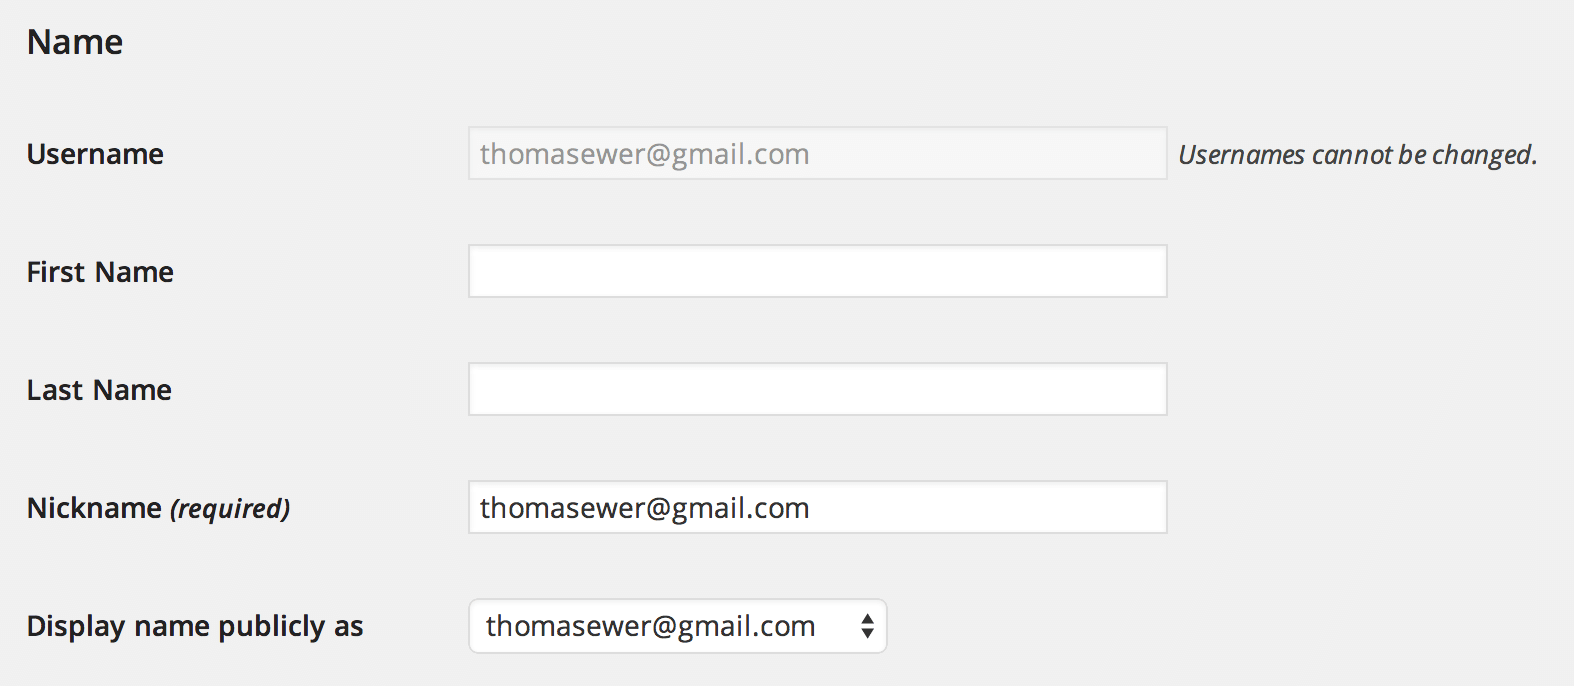
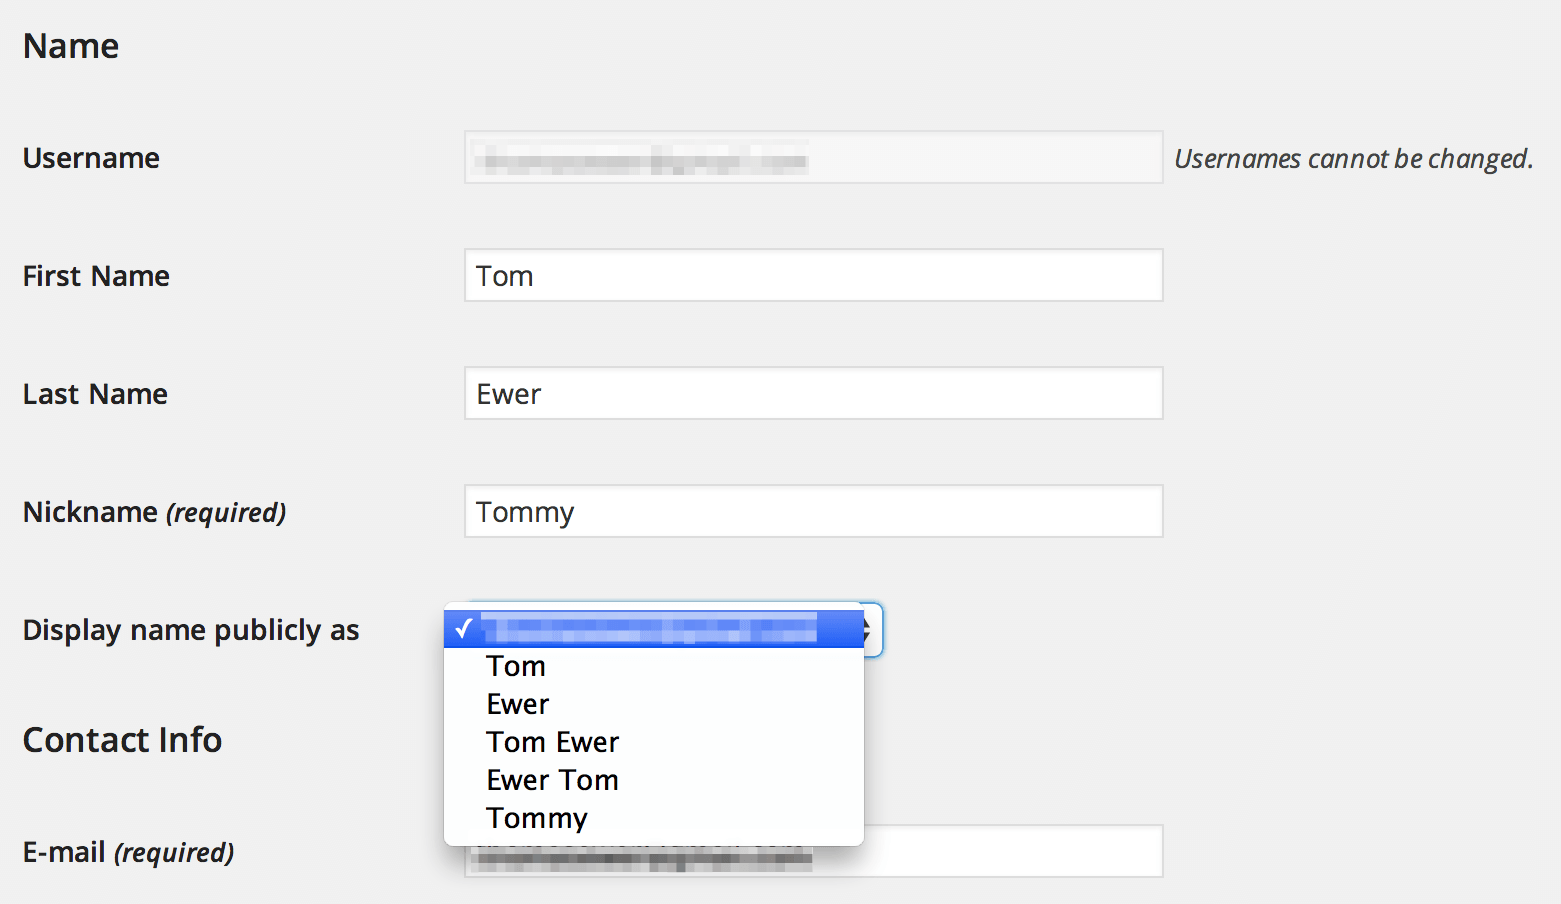
The fields here are pretty self explanatory. You can enter your first and last name as well as a nickname. But what really matters is the Display name publicly as field. This drop down menu will be populated by the fields above. You can choose from a number of combinations:
- Your username
- First name
- Last name
- First name + last name
- Last name + first name
- Nickname
Here’s an example of the options will have to choose from:
Pick whatever takes your fancy – just remember that your visitors are likely to see it!
Your Password
When it comes to your blog, security should be a pretty big deal. There are plenty of bloggers out there who have been the victim of malicious hackers and ‘bots.’
Fortunately, WordPress security doesn’t have to be a complicated affair. There are three key questions you need to ask yourself when it comes to your blog’s security:
- Do I have a strong password?
- Is everything on my site (WordPress itself, plus any installed themes and plugins) updated to its latest version?
- Am I taking regular backups?
Let’s create a positive answer to the first question right now and make sure that your password is suitably strong.
If you followed my steps in Part 1, a strong password will have been generated for you. If you decided to use your own password, now is the time to assess whether it is strong enough.
Here’s a secure set of criteria you should be shooting for:
- 10+ characters
- Absolutely no dictionary words or proper nouns
- A mixture of letters, numbers and symbols
- Use of lowercase and uppercase characters
- Not used for any other website
Basically, passwords such as “password” and “12345678” are an absolute no-no, as are the likes of “guinnesslover” and “bonjovifan”.
If your passwords looks like “Y25BuP@k/3!7+h” or “7fdA#vXAWzO+vi”, you’ll be fine. I use the Strong Password Generator site to generate strong passwords, and I recommend that you do the same.
I know that entering a simple password is far more convenient, but if you value your blog’s security, you’ll use a strong password. You can use a free web service such as LastPass to greatly simplify the storage and recall of your passwords.
Once you’ve come up with a secure password, enter it twice in the two fields near the bottom of your Profile screen:

If you get the Strong message you see above, you’re all set.
Once you’ve finished entering your name and password, click the Update Profile button at the bottom of the page.
Step 2: Delete Sample Content
To give you an idea of what’s possible, a default WordPress installation includes a sample Post, Page and Comment. Your first step should be getting rid of these, as they’re not exactly going to look impressive for your visitors.
Let’s get rid of the post first. Navigate to Posts > All Posts from the sidebar. The subsequent page is where you’ll be able to find a list of all the posts on your site in the future. For now you’ll just see the one lonely sample post:
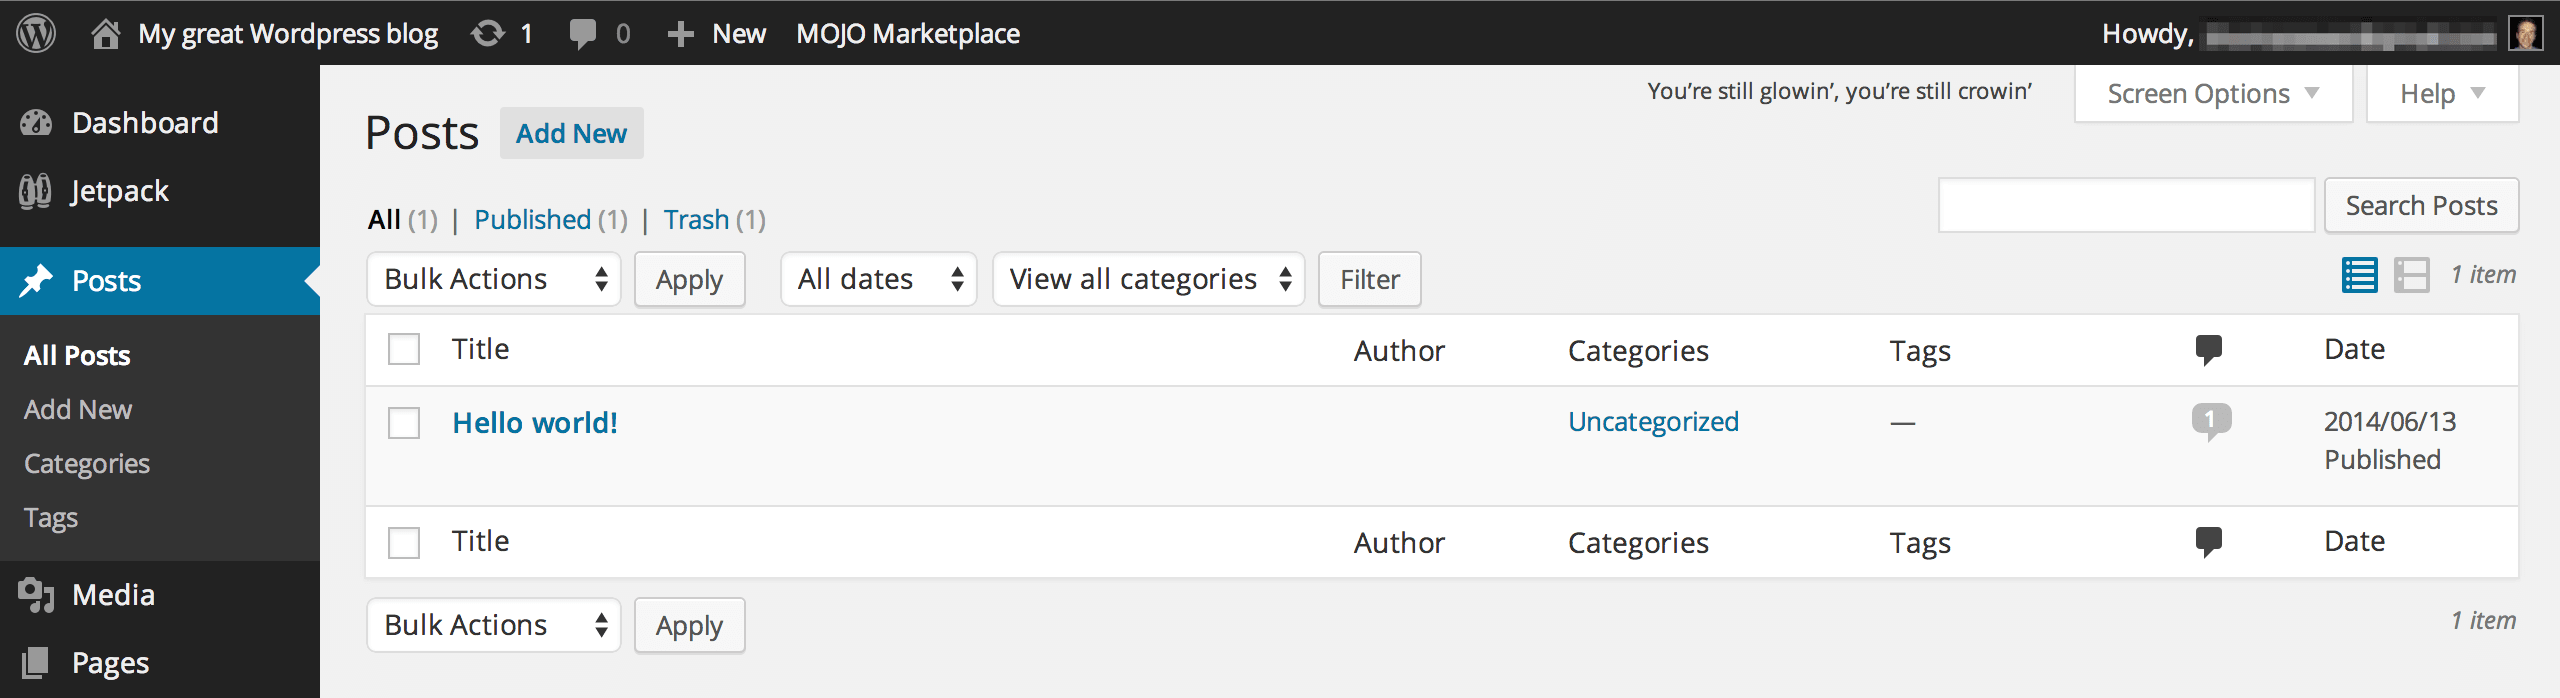
To delete the post, just hover over its title (“Hello world!”) and click on the Trash option:
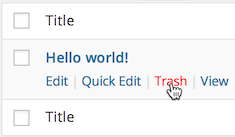
Hey presto! The post will be gone. The sample comment will be automatically deleted, as it was associated with the deleted post.
To delete the sample page, just navigate to Pages > All Pages from the sidebar and repeat the above process.
Step 3: Delete Unwanted Plugins
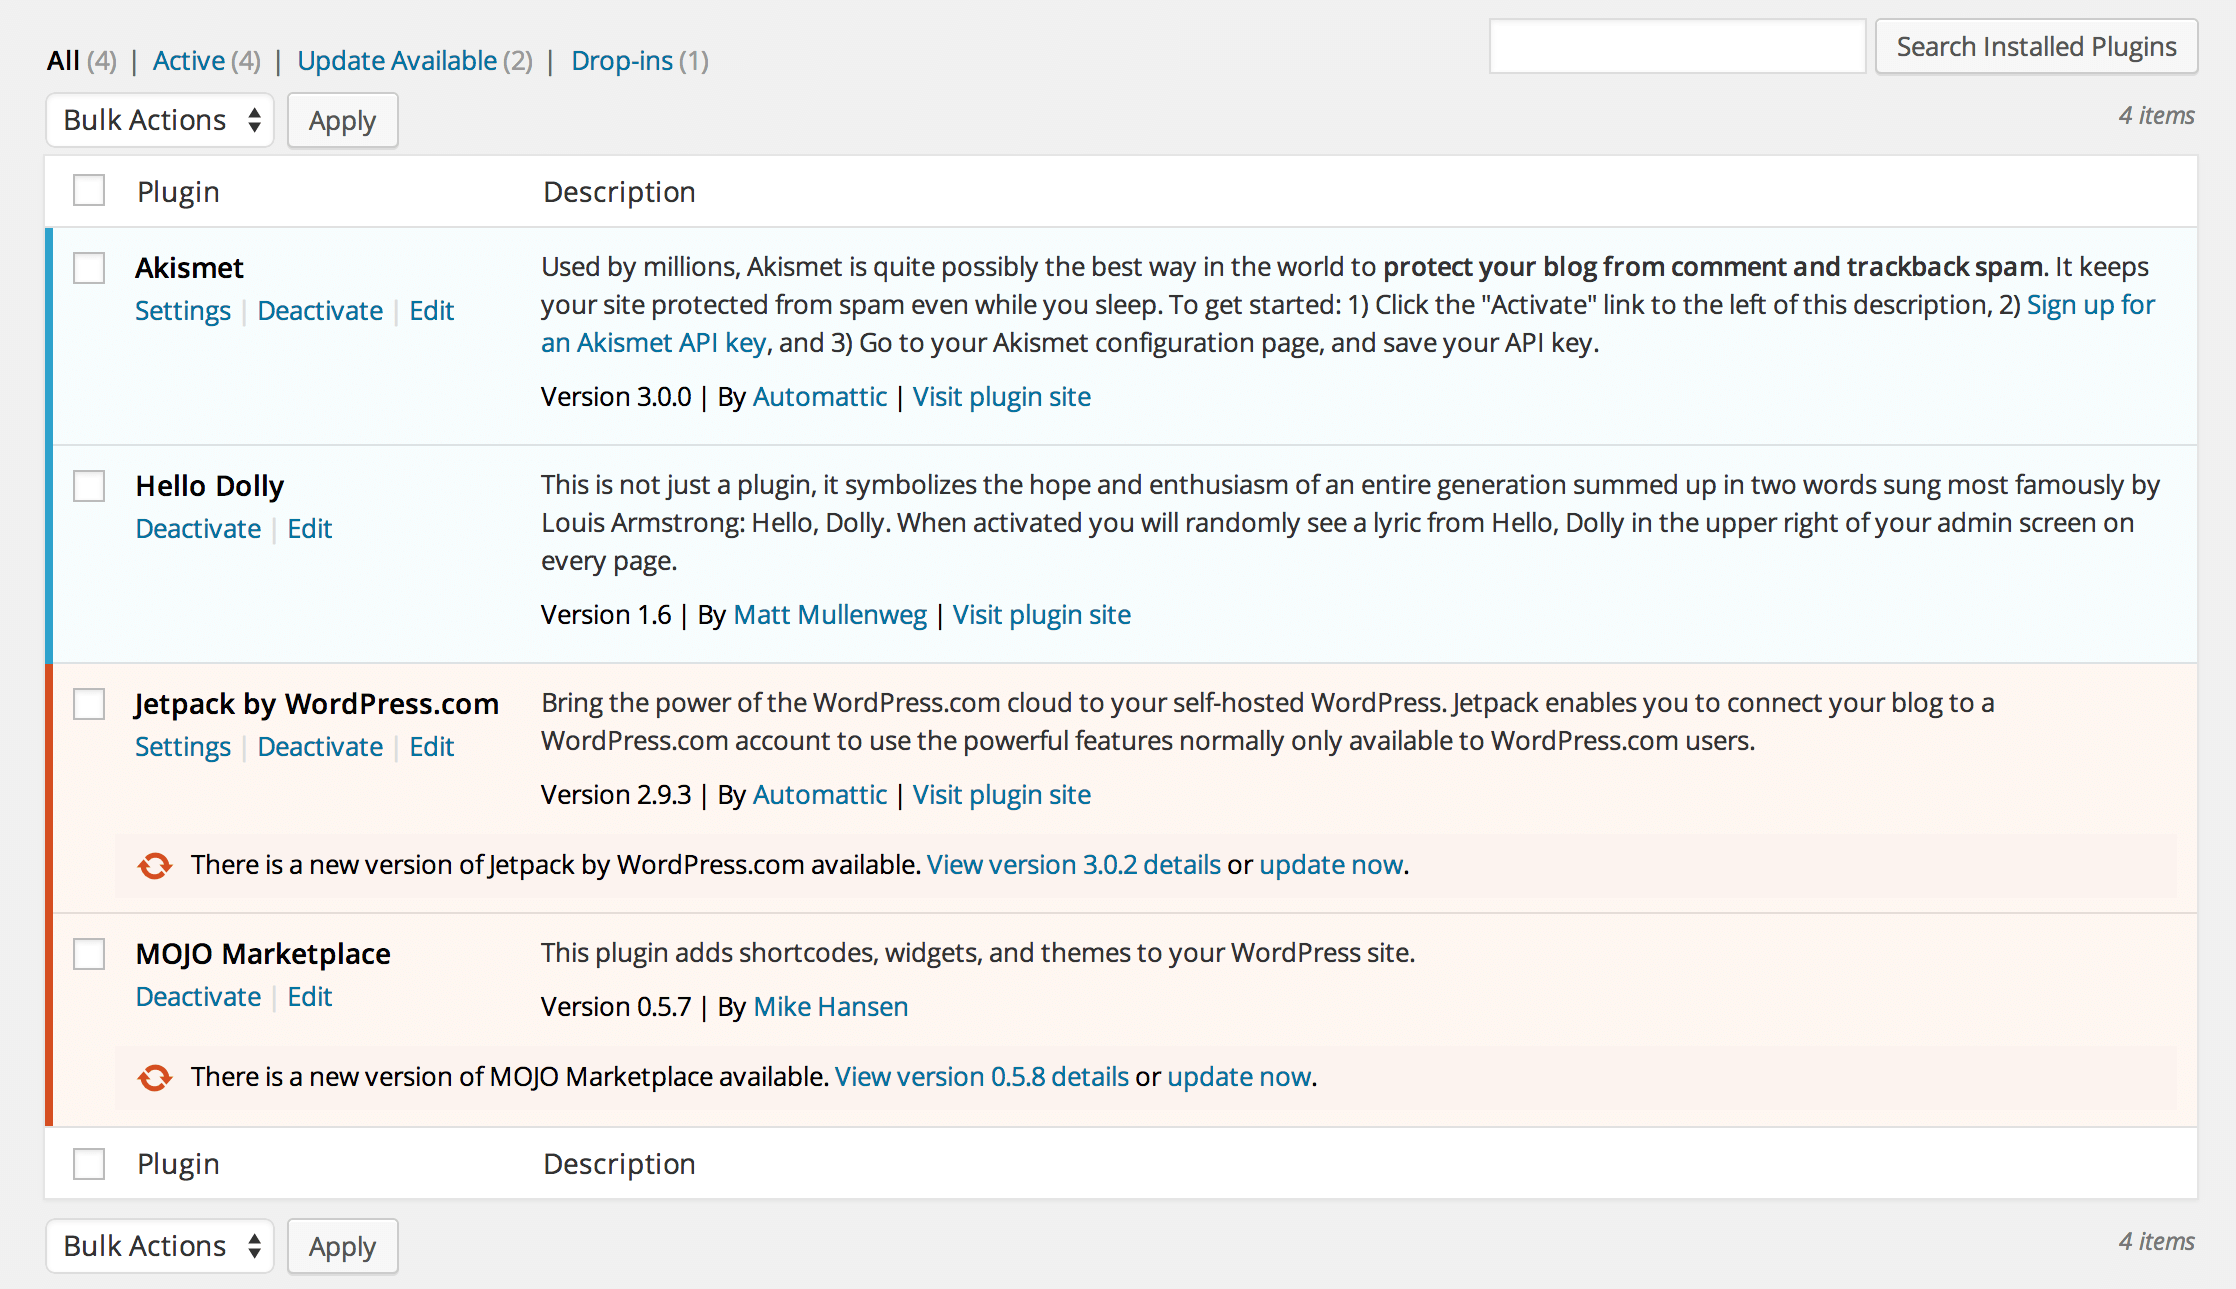
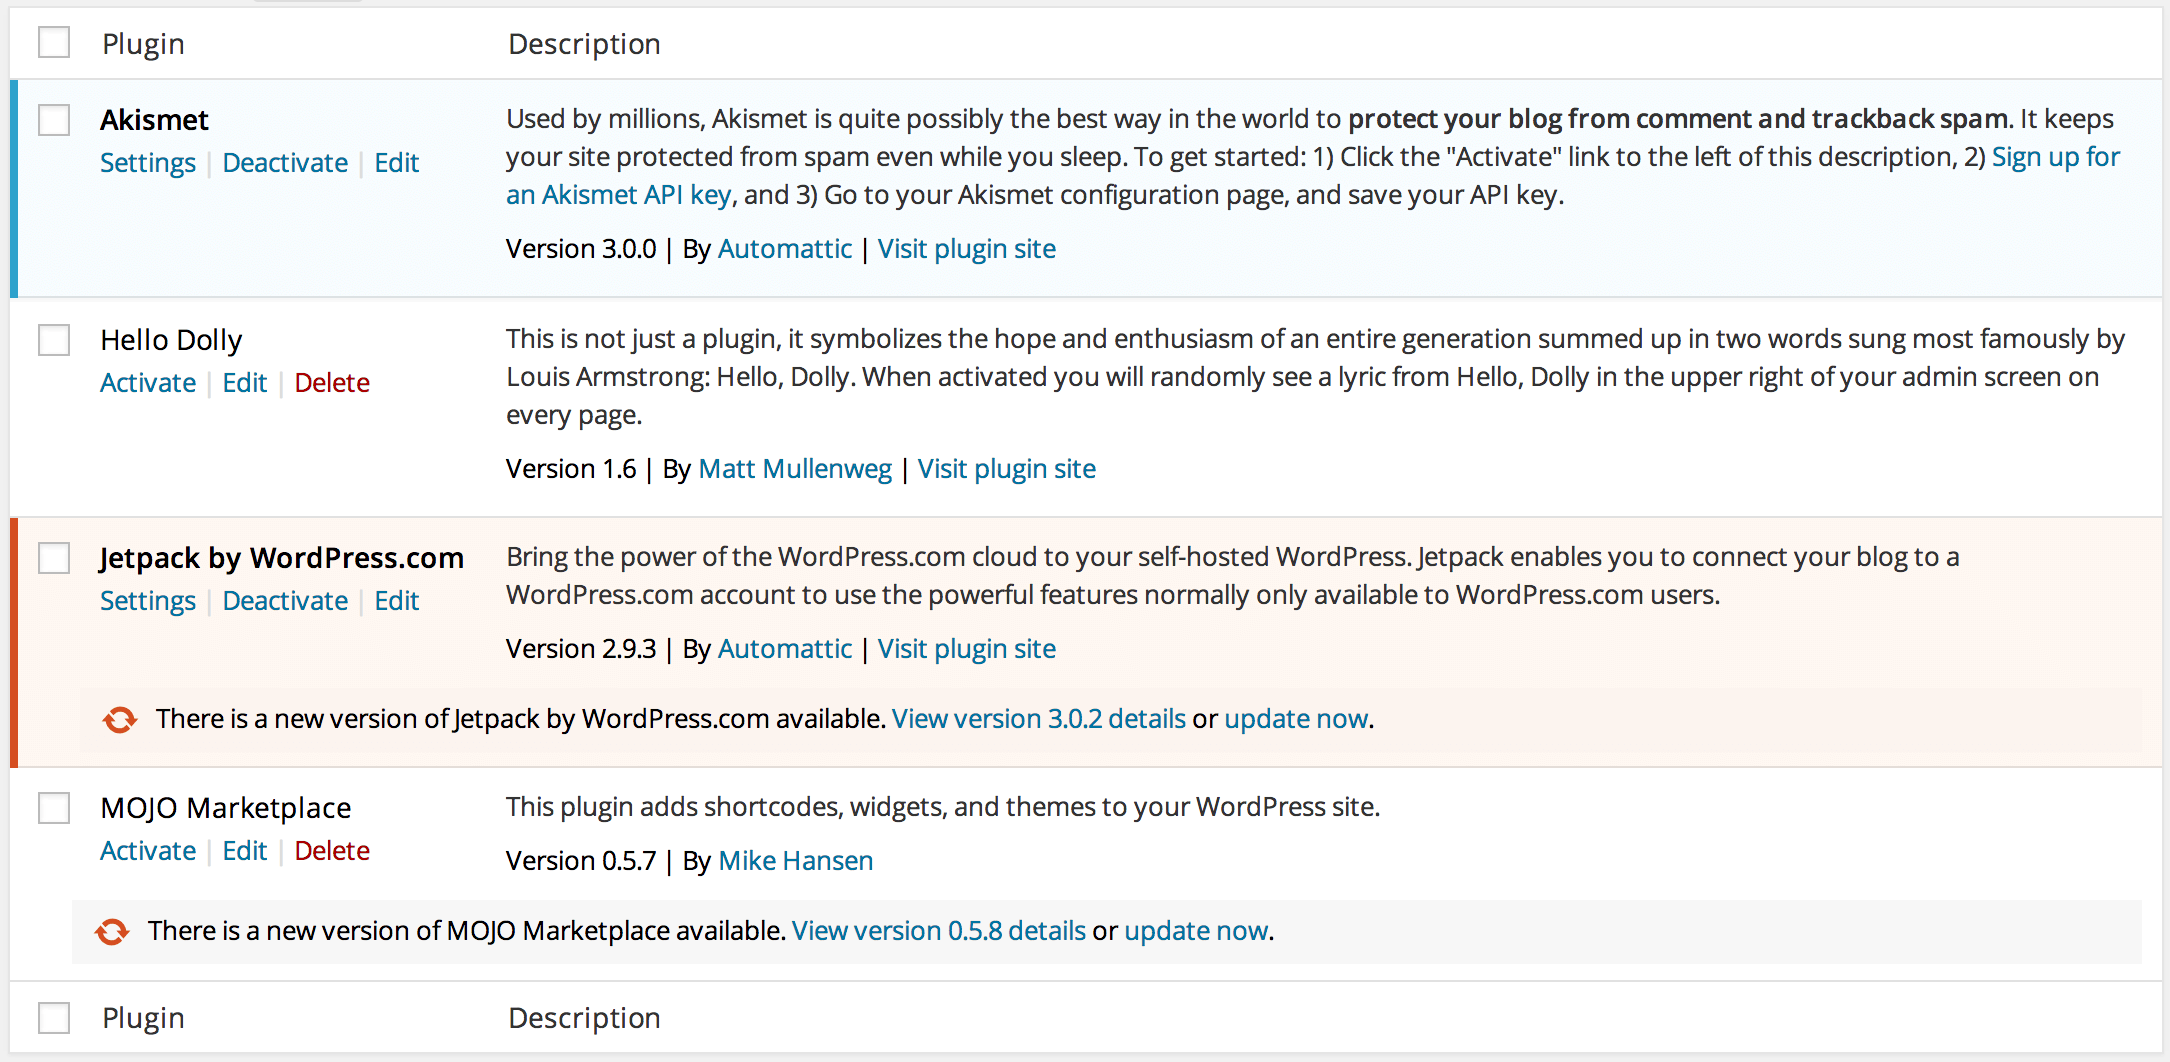
If you followed my steps in Part 1, your blog will have been pre-installed with the following plugins:
- Akismet
- Hello Dolly!
- Jetpack
- MOJO Marketplace
Akismet and Jetpack can stay – you’re almost certainly going to use them later – but at this time we’ll want to get rid of Hello Dolly! and MOJO Marketplace.
Hello Dolly! is a completely useless plugin that simply displays random lyrics on your WordPress Dashboard from – you guessed it – the Hello Dolly! musical:

MOJO Marketplace is bundled with all Bluehost WordPress installations. It’s a premium (i.e. paid) theme and plugin marketplace. We won’t be using it.
So, how do we uninstall unwanted plugins? The process is very easy.
Navigate to Plugins > Installed Plugins from the sidebar. You’ll be presented with a list of all plugins currently installed on your site. You will see the four plugins mentioned above:
You’ll also spot the Deactivate links below each plugin’s name (plugins must be deactivated before they can be uninstalled).
As you would expect, you can deactivate a plugin simply by clicking on the Deactivate link, but since we’re planning on uninstalling two plugins, there’s a quicker way.
First, check the boxes besides the Hello Dolly! And MOJO Marketplace:
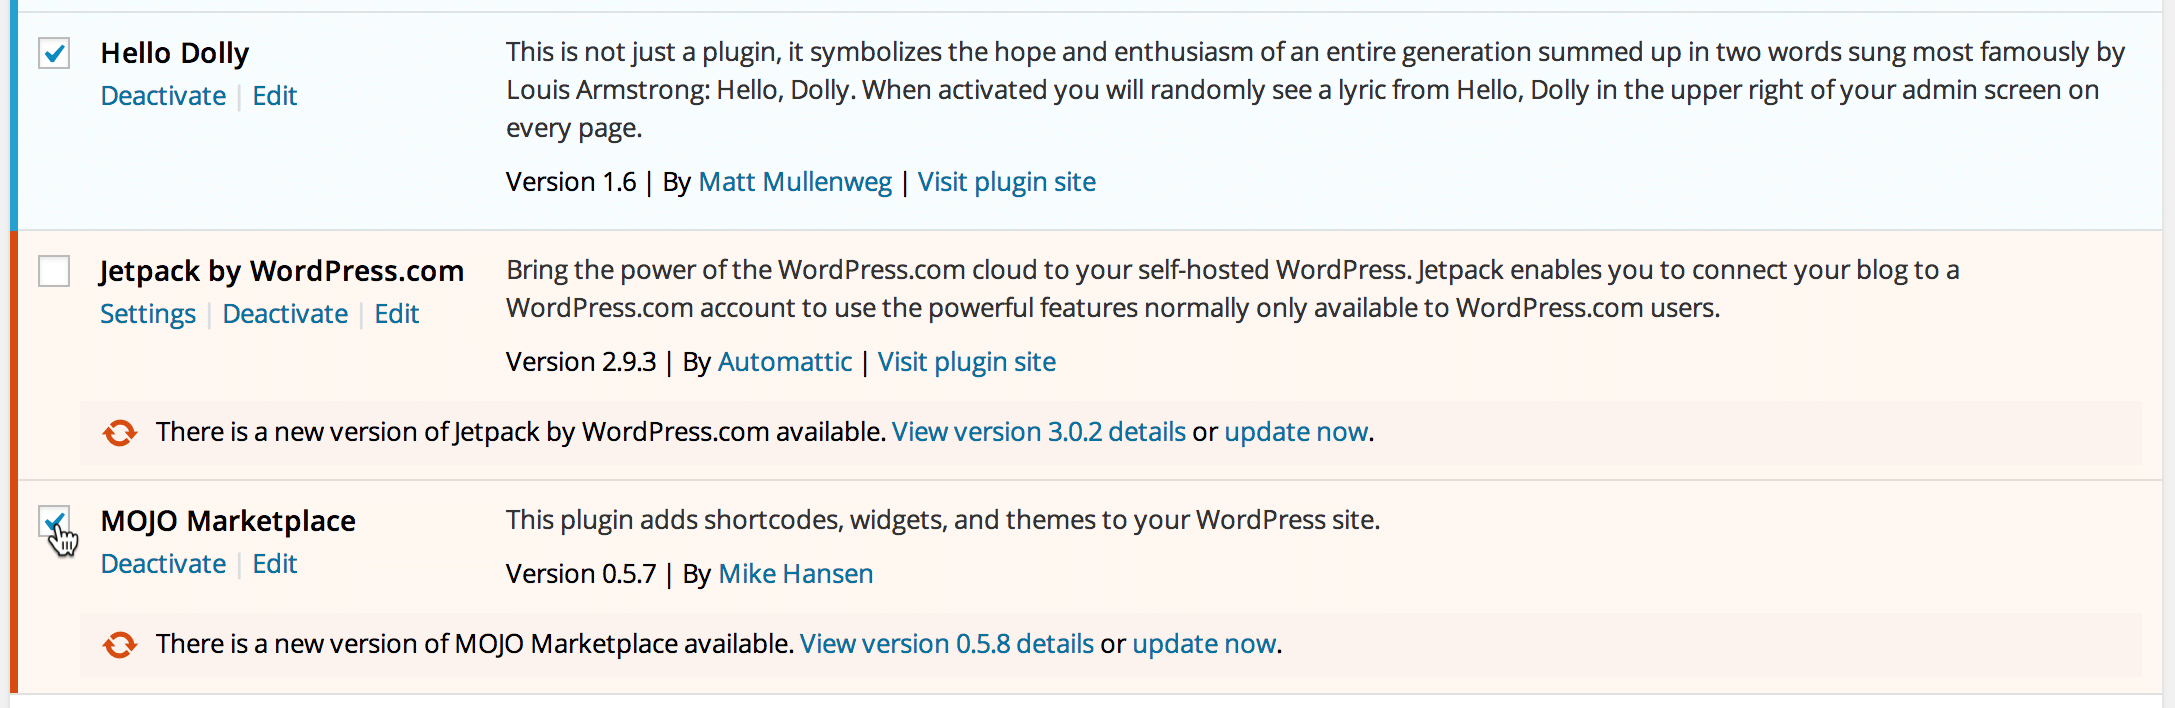
Then select Deactivate from either of the Bulk Actions drop down menus (you’ll find them above and below the plugins list) and click on Apply:
The page will reload and you will see that the Hello Dolly! and MOJO Marketplace plugins have been deactivated. You can easily tell because they both now have white backgrounds:
In case you’re wondering, blue plugins are active and red plugins have an available update.
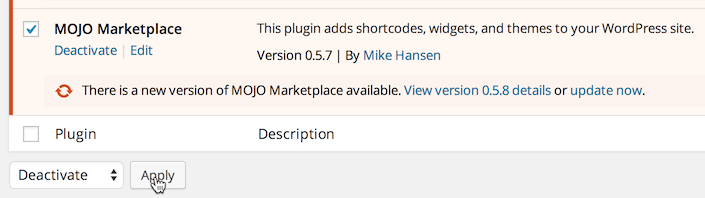
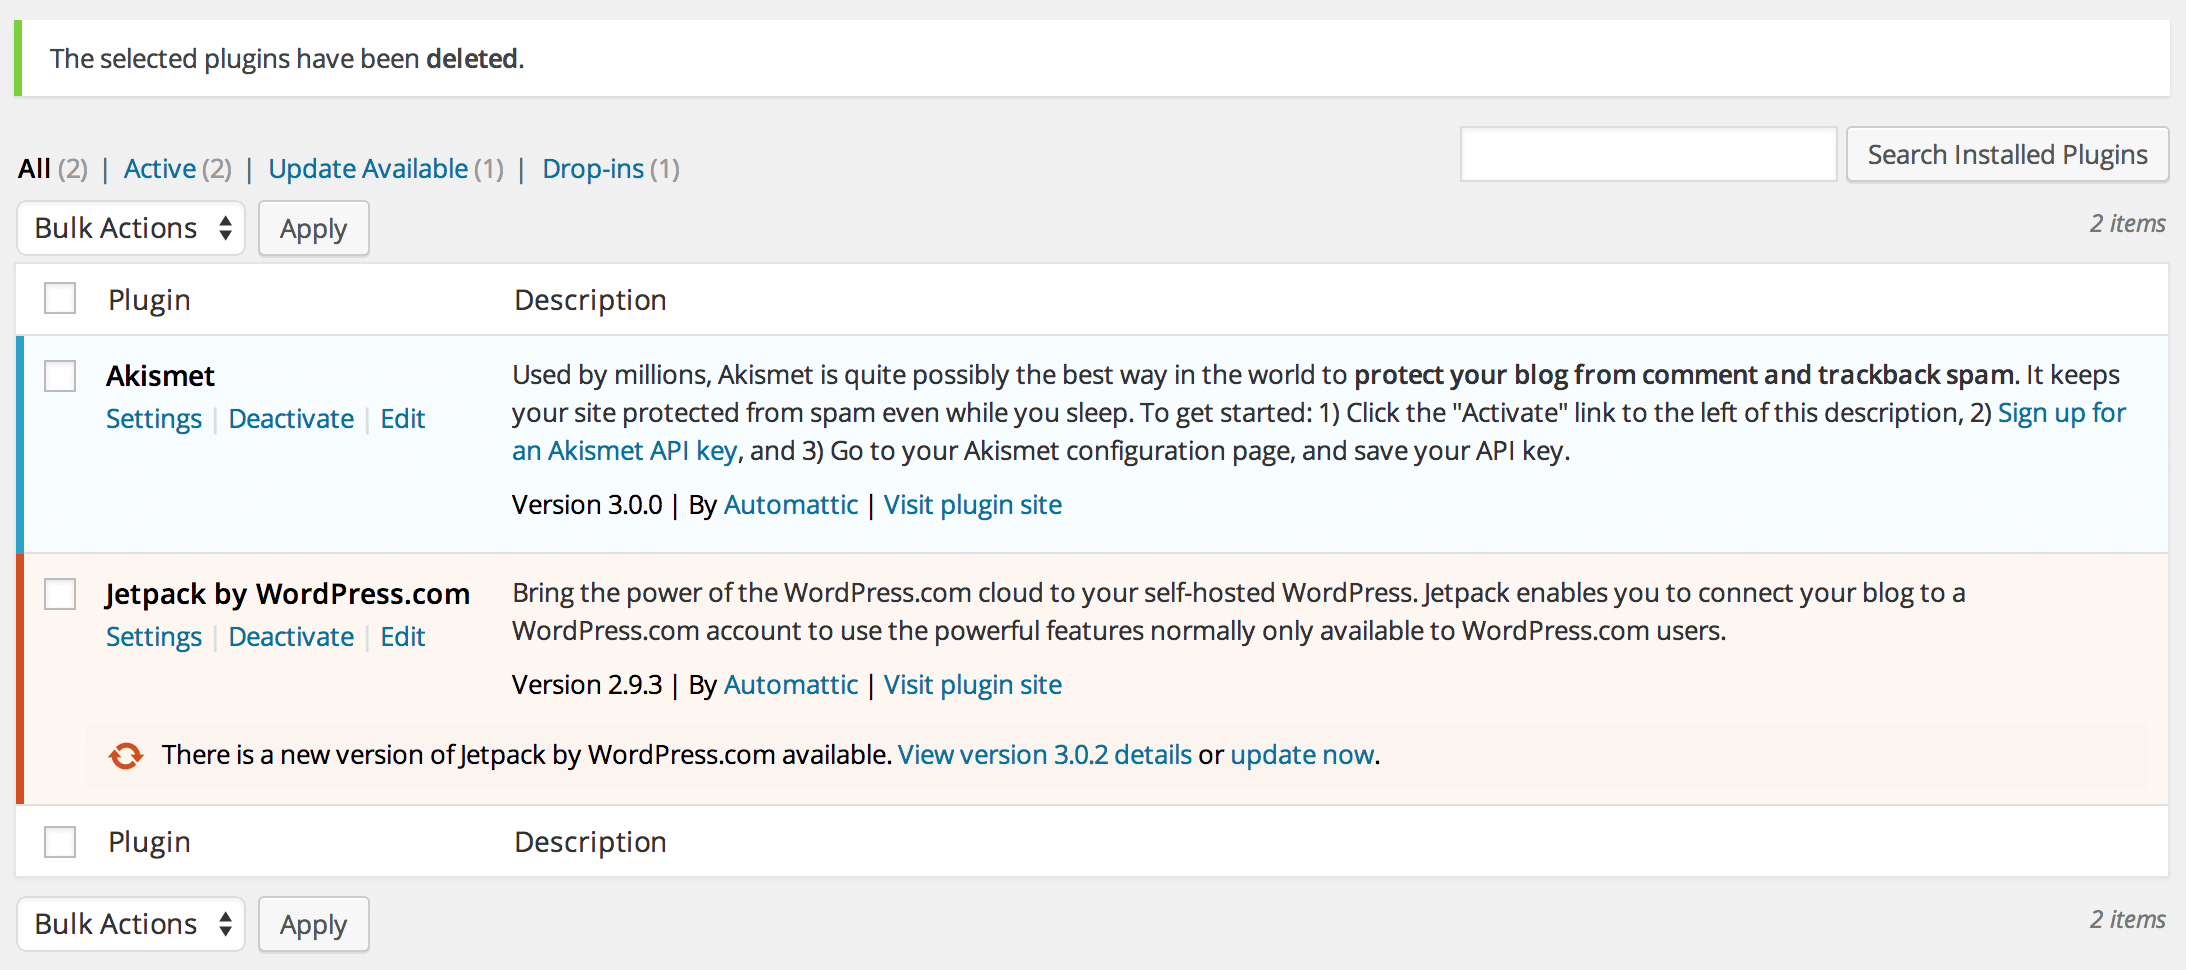
To delete the plugins, check the same boxes as before and select Delete from either of the Bulk Actions drop down menus. You’ll be redirected to a confirmation screen where you need to click on the Yes, Delete these files button.
You’ll be sent back to the Plugins page, where only Akismet and Jetpack will remain:
Step 5: Fine-Tune Your Settings
With the fiddly bits out of the way, let’s get down to customizing your blog’s settings to fit your needs.
Each of the following menu options can be accessed by hovering over the Settings menu in the sidebar.
General
The General screen is where you can choose a name and ‘tagline’ for your blog.
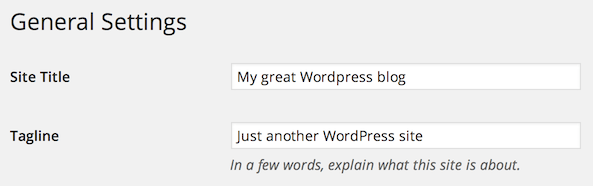
While you’re on this page, make sure that there is a valid email address (i.e. one that you actually check) in the E-mail address field.
Other settings that you may want to fiddle with on this page include Timezone, Date Format, Time Format, and Week Starts On. They should all be self-explanatory.
Discussion
On this page you will find all of the settings relating to how you and visitors to your site interact.
The most important settings on this page are the first three:
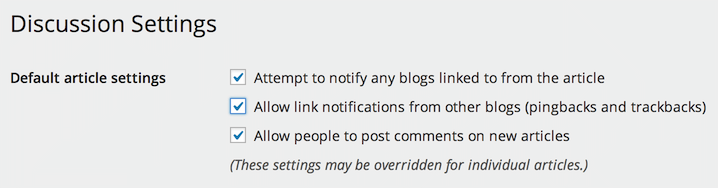
You should keep the first box checked – there is no downside to notifying other blogs that you have linked to them.
I advise that you uncheck the “Allow link notifications form other blogs (pingbacks and trackbacks)” option. (If you want to learn more about pingbacks and trackbacks, click here.)
If you want comments on your blog, you’ll want to keep the third box checked. Enabling visitors to comment on your articles is a huge part of what blogging is all about, so I’d advise that you allow it to happen. However, if you don’t want to enable comments, just uncheck the box.
While you can largely ignore most of the options on this screen, there are a few more that you should pay attention to:
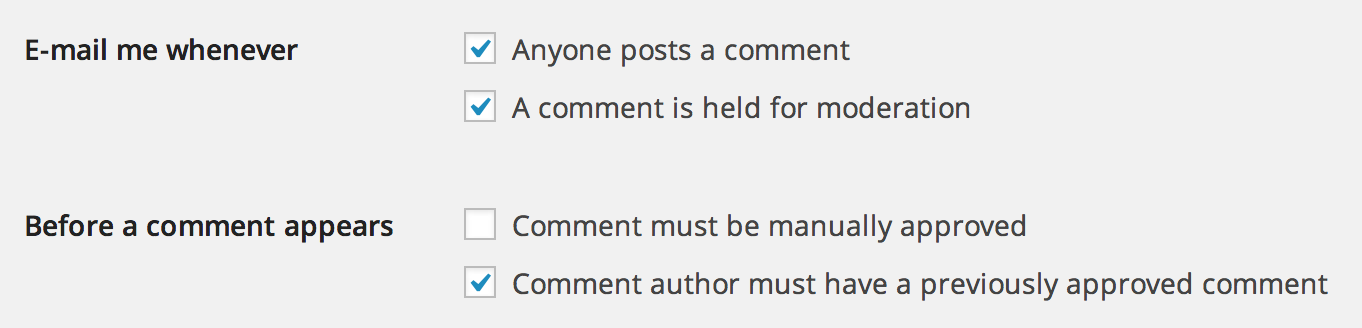
If you keep the first box checked, you’ll receive an email notification whenever anyone leaves a comment on your site. If the idea of adding more emails to your inbox doesn’t excite you, uncheck this box – you can still read through new comments via the Comments screen, accessible from the sidebar.
It’s best to keep the second box checked, as you’ll probably want to know if a comment is held for moderation. By default, this happens if a comment includes more than two links (this is often indicative of spam).
Next, you want to decide how hands-on you’ll be with comments moderation. If you keep the “Comment must be manually approved” box unchecked, comments will be published as soon as they are submitted. If you check the box, you will have the opportunity to manually moderate and approve (or otherwise) each comment as it is submitted. I recommend that you keep this box unchecked – not only is comments moderation an onerous task, commenters aren’t typically pleased to see that their comment has been held for moderation.
For that same reason, I advise that you uncheck the “Comment author must have a previously approved comment” box. Personally, I’d rather delete distasteful/spam comments retrospectively than manually approve each comment by a new author.
Ultimately, it’s up to you. You can always come back to this screen at a later date and much adjustments as necessary.
Permalinks
Last, but not least, we need to set a permalinks structure for your blog.
Permalinks are the URLs to each of your blog posts, pages, etc. For example, the permalink of this tutorial is http://beginnerblogging.net/setting-up-your-wordpress-blog/.
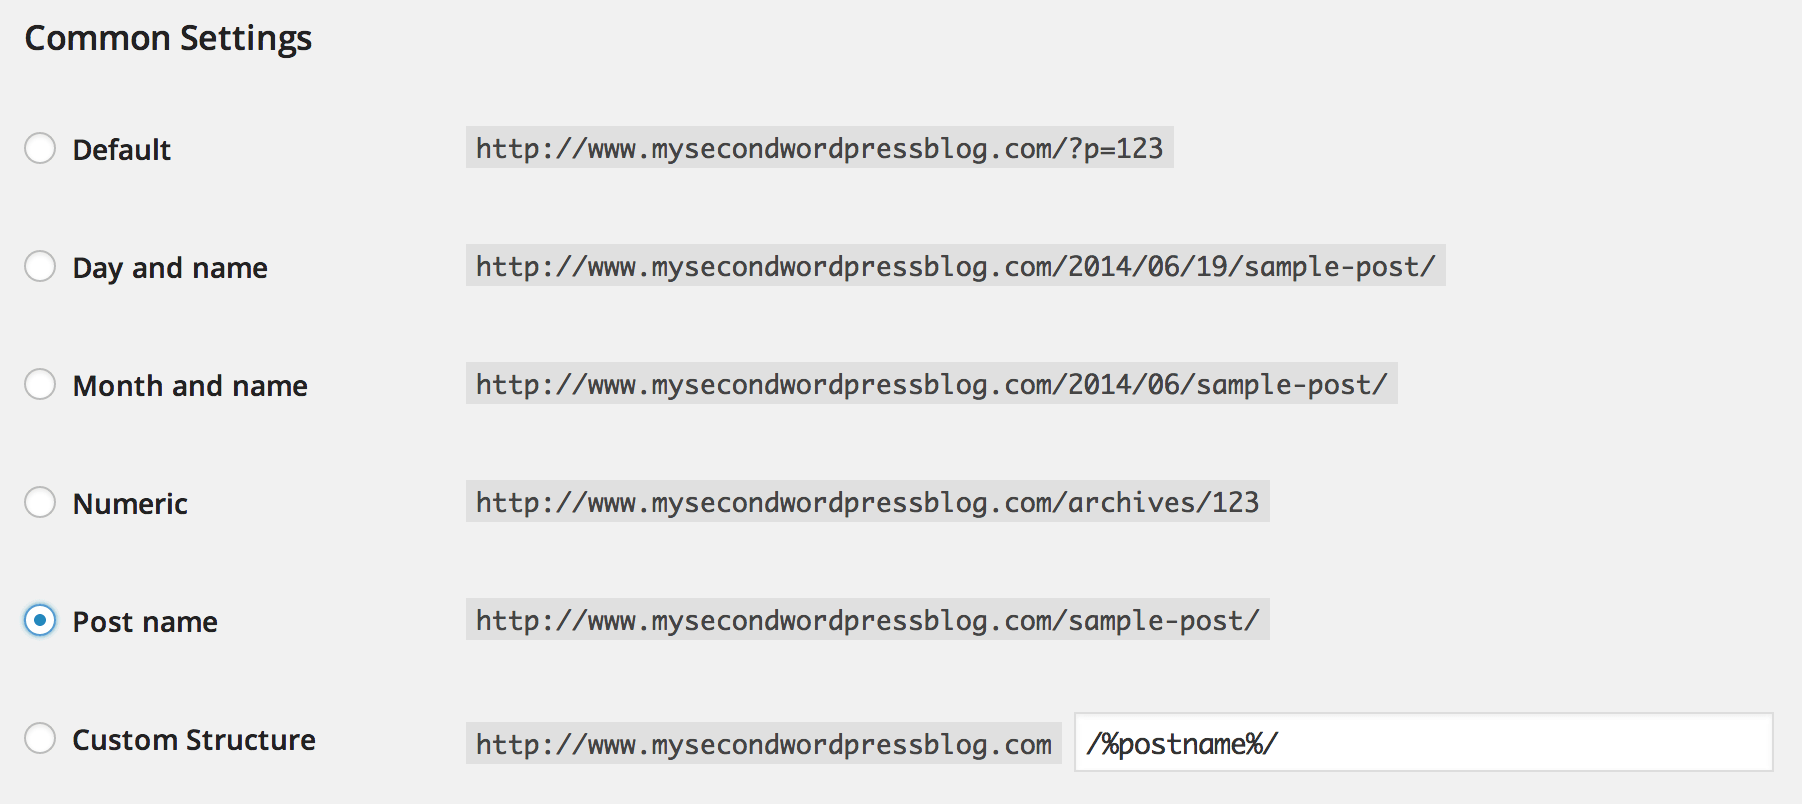
By default, WordPress chooses an ‘ugly’ permalink made up of numbers and characters:
We want to change it so that permalinks are more ‘attractive’ and user friendly, like this:
![]()
Doing so is easy. On the Permalinks screen, simply select the Post name option from the list:
Now your posts’ and pages’ permalinks will be based upon their titles. You can also customize them to be whatever you want, but we’ll get onto that later in the course.
That’s It!
Above are the key changes you should make. While there are plenty of other settings you can fiddle with, we’ve covered only the most important options above in order to keep things simple.
Feel free to play around with other settings you find – as I said at the top, just about anything you change in terms of the settings is reversible or recoverable.